From Pixels to Stitches…
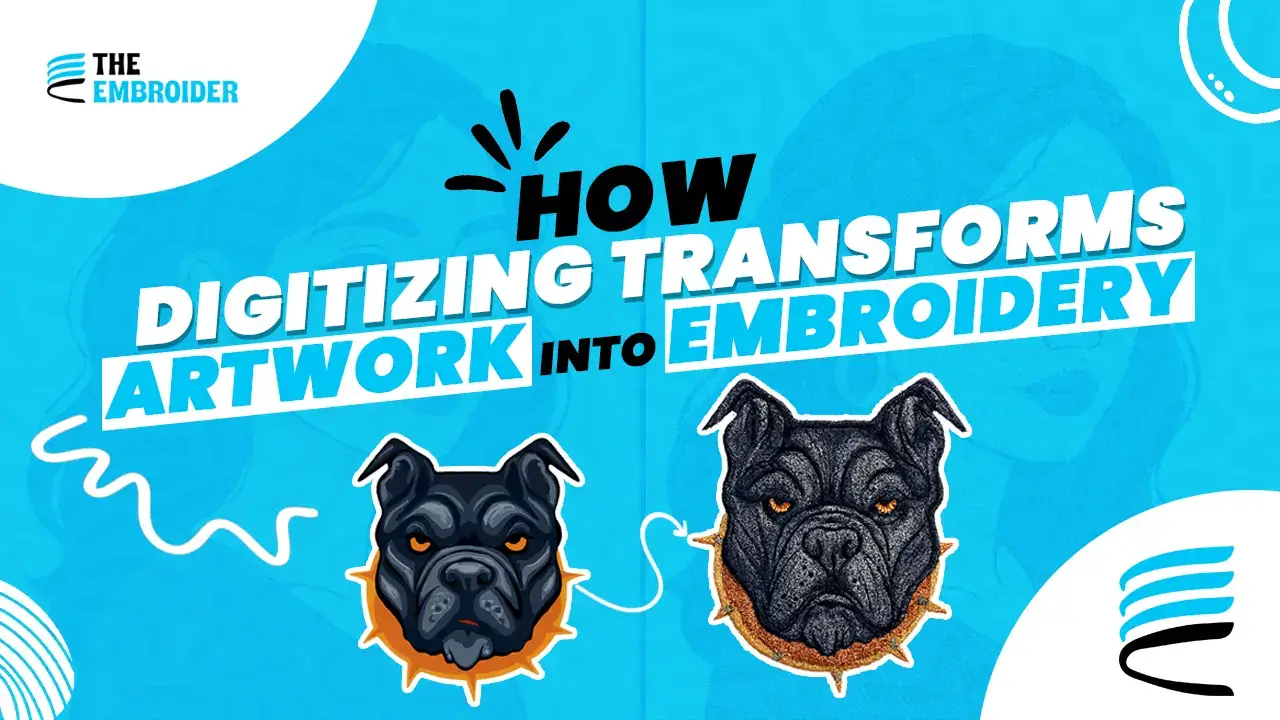
Ever seen a design on screen and thought, How does that become real, stitched fabric? That’s what happens when someone transforms artwork into embroidery. It’s turning art into stitch files that machines read, then using thread, needles, and fabric to make it come alive.
I’ve messed up designs in the past, too many details, wrong fabric, but each time I learned something new. In this guide, I’ll walk you through what digitizing is, how it works, what tools you need, and how to avoid mistakes.
What Is Embroidery Digitizing?
- Embroidery digitizing means converting a digital design into a file an embroidery machine can follow. It includes choosing stitch types, adjusting density, and planning underlay so fabric stays stable. Check out our Embroidery Digitizing Service for examples and premium files that transform artwork into embroidery exactly right.
- According to Printful, digitization is required for all custom embroidery designs to meet machine requirements to avoid issues like thread breaks or uneven stitching.
Market Trends & Industry Size
These numbers show that embroidery digitizing isn’t just a niche, it’s becoming more mainstream, with designers & brands investing in tech and skills to transform artwork into embroidery that sells (and lasts).
How the Process Works: From Artwork to Embroidery
Here’s how the digitizing process usually flows. Each stage matters when you want your design to stitch out well.
1. Image Preparation
- Start with a clean image. Designs with fewer colors, clear outlines, and high resolution (300 DPI or more) work best.
- If art is too complex, simplify: reduce tiny details which may not stitch well.
2. Choosing Stitch Types
- Running Stitch for fine lines or thin borders
- Satin Stitch for smooth, shiny edges or decorative outlines
- Fill Stitch for large areas or backgrounds
3. Density & Compensation Settings
- Stitch density affects how tightly stitches are spaced. Too dense → fabric puckers; too sparse → looks weak.
- Pull / push compensation helps adjust for fabric distortion (especially on stretchy or knit fabrics).
4. Stitch Order & Direction
- Sequence (which part you stitch first) avoids gaps or misaligned layers.
- Direction of stitches affects how they reflect light, how texture looks, and overall design flow.
What Artwork Can & Can’t Be Digitized
- Logos, text, illustrations, scanned sketches all can work.
- Small patches or badges require simpler designs. Tiny shading or minute details may not show up clearly once stitched.
Essential Tools & Software
- Digitizing software: must support vector conversion, different stitch types, underlay, density adjustment. Learn more about free tools in our guide Free Embroidery Digitizer Softwares for budgeting beginners.
- Embroidery machine: test designs on similar fabric.
- Optional tools: pen tablet, sample fabrics, good computer screen.
Challenges You’ll Face & How to Solve Them
| Challenge | What Happens | How to Fix It |
| Too much detail in small designs | Details blur, stitches overlap | Simplify design, reduce color count |
| Fabric problems (stretch / texture) | Distortion, skipped stitches | Use proper stabilizer, adjust tension |
| Software limitations | Some shapes get misinterpreted | Choose software with good reviews, test small runs |
| Learning curve | Mistakes & wasted thread | Start with small projects & practice |
Final Thoughts
When someone Transforms Artwork into Embroidery, it’s a blend of art, tech, and patience. Getting your stitches right, the fabric chosen well, and design optimized makes all the difference.
With the right tools, some practice, and attention to detail, you’ll stop looking at flat designs and start holding real, stitched pieces in your hands. Keep designing, keep digitizing, and enjoy seeing your art in thread.
FAQs
Q1: What file formats are best when digitizing artwork into embroidery?
Vector formats (SVG, AI, EPS) are ideal for scaling. High-resolution raster (300 DPI) works too, if vector isn’t possible.
Q2: How small can a design be and still look good stitched?
As a rule, around 2-3 inches is a safe minimum for patches with fine detail. Anything smaller might lose clarity.
Q3: How much does professional embroidery digitization cost?
It depends on design complexity and stitch count. Basic logos cost less; full-color designs with many layers & custom effects cost more.
Q4: Can I digitize artwork myself or should I hire someone?
You can start doing it yourself if you have the right software & tools. But for complex designs or selling professionally, hiring someone with embroidery digitizing experience often leads to better, faster results.